

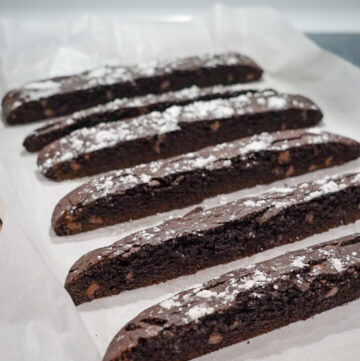
Let's make Homemade Dark Chocolate Biscotti
I have something fun for you! Homemade dark chocolate Biscotti, yum! These twice-baked Italian cookies are super easy to make and you can customize it with your favorite add-ins. I can’t believe I haven’t made these before and now I can’t get enough. You can dunk my biscotti in your favorite hot beverage. For my first go at this recipe, I did pretty good! Make sure you take your time forming the logs when you bake it for the first time. It took me a bit to get the right shape. It helps to flour your hands so they don't stick to the dough. Keep reading to get more tips!
Check out my Instagram to get more fun recipes!
Ingredients for the Homemade Dark Chocolate Biscotti
You really don’t need much to make my recipe. I didn’t even need to pick up additional ingredients at the supermarket, I had everything at home.
- Flour: I used Bob’s Red Mill all purpose flour.
- Eggs: Eggs act as a binger for the biscotti and provide moisture to the dough.
- Butter: Provides flavor and keeps the texture crispy and delicious.
- Sugar: The sugar provides a sweetness to the dough, it doesn’t overpower the flavor.
- Baking powder: Helps expand the dough for proper baking.

What else can I add?
- Dried fruit
- Chopped nuts
- Grounds species (cinnamon, nutmeg, etc)
- Matcha
- Orange, peppermint, lemon
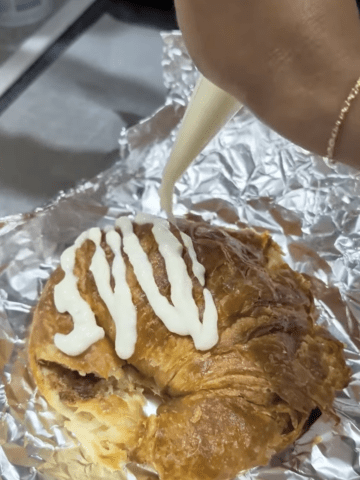
- Dipped in chocolate or drizzled with icing
How to store Biscotti
Make sure your biscotti cools completely before you store it. I kept mine on the stove top for 20 minutes before I popped them into ziploc bags. You can also wrap it tightly and store it in the freezer. If it's in the freezer, make sure you thaw it out before you reheat it.
Homemade Dark Chocolate Biscotti
Ingredients
- 1 ¾ cups All purpose flour
- ¼ cup Unsweetened dark chocolate cocoa powder
- 1 teaspoon Baking powder
- ¾ teaspoon Salt
- 1 Stick of unsalted butter (softened)
- 1 cup Granulated sugar
- 2 Eggs
- 1 cup Dark chocolate chips
- 1 ½ teaspoon Vanilla extract
- 1-2 teaspoon Espresso powder (optional but it's so good it really helps you take this recipe to the next level)
Instructions
- Preheat oven to 350-degrees. Prepare large baking sheet by lining with parchment paper. I find that parchment paper cooks better.
- Whisk together flour, cocoa powder, baking powder, salt, and espresso powder. Set aside.
- Using your electric mixer beat the butter and sugar until fluffy. Add eggs and vanilla extract, beat the mixture until combined well.
- Stir in flour mixture to form a stiff dough. Next, mix in the chocolate chips. You can use your hands if you're having a tough time mixing it in since the dough is stiff.
- With this step, it depends on how you roll out your dough. You can either roll it out and decide not to divide the dough (which is what I do when I'm lazy)Or you can divide the dough in half and flour your hands. Form the dough into two flat logs on the baking sheet. Around 12 inches long and 4-6 inches wide. About two inches thick as well.
- Bake the logs at 350°F (175°C) for about 30–35 minutes, cool for 10–15 minutes, slice into ½-inch pieces, then bake the slices for 10–12 minutes per side until dry and crisp.
- Cool on your rack when done. enjoy!
- Optional: dip into melted dark chocolate after and sprikle with sea salt!


In Alexa's Kitchen says
I realized I left a lot out of the original recipe and it has been updated. Sometimes I write these late at night and I miss things. Apologies
Phyllis says
How many slices should each log be cut into?
In Alexa's Kitchen says
So I cut mine into 6 long logs but you can also cut those long logs in half to make smaller biscotti. It all depends how you want it! If I was to make it again I would make the logs smaller. Easier to dip 🙂
Andrea k says
I just made the recipe. There isn’t enough dough to make two, 2-inch thick logs of that size. Did you mean 2 cm? Also, my bake time was a lot longer to get them crispy.
In Alexa's Kitchen says
With this recipe, once it's baked, it gets crispy the longer it sits out and cools. Cook time doesn't make it crispy; it actually burns them and ruins the recipe.
Elizabeth says
How do you store these? I am wanting to bake them a week ahead to take to my grandmother.
In Alexa's Kitchen says
I would recommend baking a few days ahead. The biscotti tends to lose its crispiness after a few days. I normally store it in a ziploc bag on my counter
Midge says
You mention using baking powder to help expand the dough for proper baking, but the recipe calls for baking soda. Which is best. Thank you.
In Alexa's Kitchen says
Thanks for catching that typo. It's 1 tsp baking powder! also, add some espresso powder to take it to the next level!